
Revit Section Box 3D Views: A Guide for Architects

A Revit section box is a 3D clipping tool that lets you cut away parts of your model to expose and examine specific areas in orthographic 3D views. Architects and design professionals use section boxes to isolate floors, rooms, structural zones, and MEP systems without permanently hiding any elements. The tool is distinct from Scope Boxes, which apply volumetric constraints across multiple view types, and from the default 3D view, which shows the entire model. Mastering revit section box 3D views is one of the fastest ways to improve coordination clarity, reduce visual noise, and produce documentation-ready 3D cuts.
What are Revit section box 3D views and how do they work?
A section box clips the 3D view at six adjustable planes: top, bottom, left, right, front, and back. Everything outside those planes becomes invisible in that view only. No elements are deleted or hidden globally. This makes section boxes safe to use at any stage of a project.
Section boxes work exclusively in orthographic 3D views. Orthographic views support precise scaling and dimensioning, which is why they are the standard for technical documentation and coordination. Perspective views do not offer dimensional fidelity, so they are not the right context for this tool.
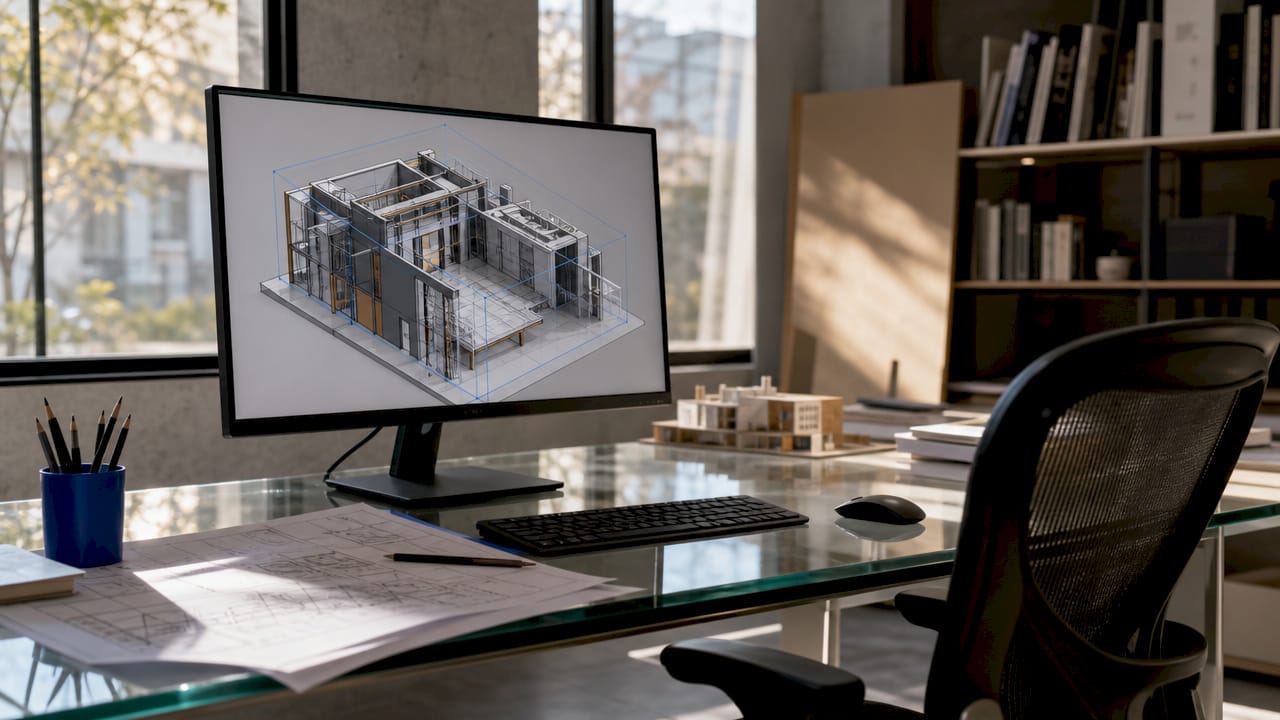
Scope Boxes are a related but different concept. Scope Boxes maintain consistent crop zones across disciplines and view types, while section boxes are specific to a single 3D view. Understanding that distinction prevents a common setup mistake where architects expect a section box to control plan views.
How to enable and set up section boxes in Revit
Getting a section box active takes under a minute once you know where to look. The settings live in the view’s Properties panel, not in the Visibility/Graphics dialog.
Activating the section box:
Open an orthographic 3D view (the default {3D} view or a duplicate).
In the Properties panel on the left, scroll to the Extents group.
Check the Section Box checkbox. A box appears around the full model.
Click and drag the blue grip handles in the 3D view to pull the planes inward.
Using the Selection Box command (shortcut BX):
Select one or more elements in any view.
Press BX on the keyboard. Revit switches to the 3D view and fits a section box tightly around your selection.
The Selection Box tool reduces visible geometry by more than 90% in large projects. That reduction directly improves pan and orbit speed.
Key settings to check:
Confirm the view is set to Orthographic, not Perspective, in the Properties panel.
Use Visibility/Graphics (VG) to confirm annotation categories are set correctly for the view.
Duplicate the 3D view before enabling the section box. Working in a duplicate preserves the original and protects your section box settings from being overwritten.
Pro Tip: Never work in the default {3D} view for serious coordination. Treat it as a temporary workspace and duplicate it immediately for any view you plan to save or share.
How to create and adjust section boxes step by step
The process below applies to any orthographic 3D view in Revit. Follow these steps in order for the cleanest result.
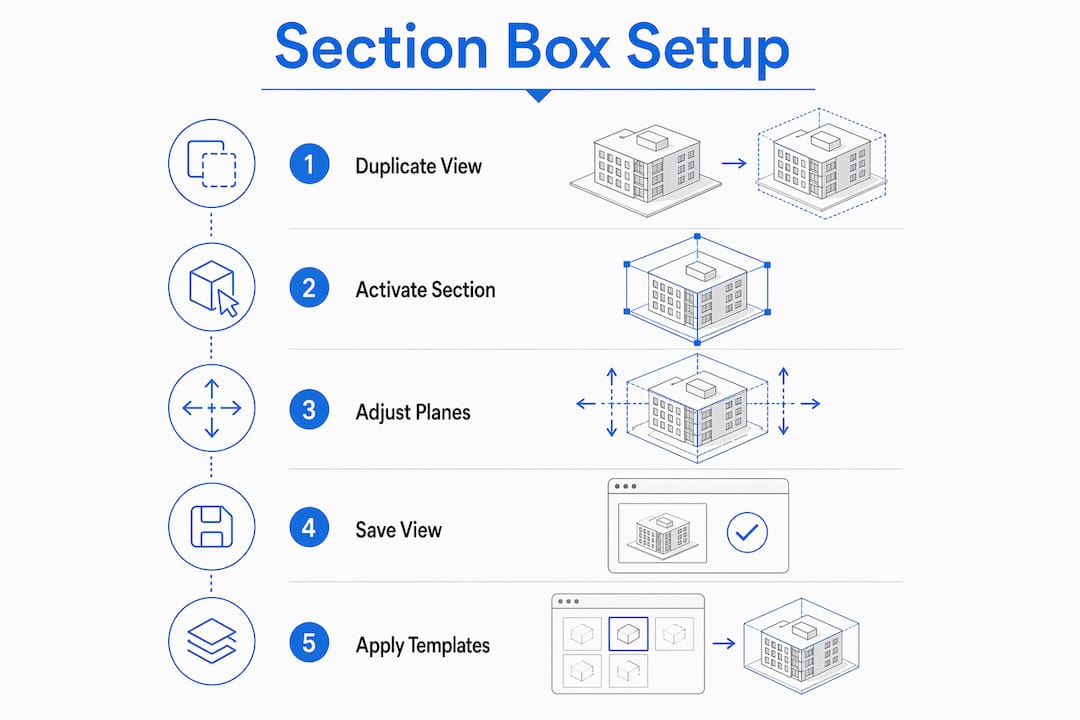
Duplicate the 3D view. Right-click the view in the Project Browser and select “Duplicate View” then “Duplicate.” Rename it clearly, for example “3D Section Box Level 2 Structural.”
Activate the section box. In the Properties panel, check the Section Box checkbox.
Use BX for a fast start. Select the elements you want to examine, then press BX. Revit fits the box automatically.
Refine in a plan or elevation view. Open a floor plan or elevation, then click the section box boundary. You can move and rotate it precisely using the blue handles and the rotate grip. Editing in 2D views gives you symmetrical, aligned cuts that are impossible to achieve by eyeballing in 3D orbit.
Assign a Scope Box if needed. In the Properties panel, set the Scope Box parameter. Assigning a Scope Box forces the section box to match its boundaries exactly, which keeps clipping consistent across disciplines.
Save and lock the view. Right-click the ViewCube and select “Save View.” Saving the view locks the orientation and section box position, making it safe to place on a sheet.
Place on a sheet. Drag the saved view onto a sheet in the Project Browser. The section box cut appears exactly as you set it.
Step | Action | Result |
Duplicate view | Right-click in Project Browser | Protects original view settings |
Activate section box | Check box in Properties panel | Box appears around full model |
Press BX | Select elements first | Box fits tightly to selection |
Edit in 2D | Move/rotate in plan or elevation | Precise, aligned cut planes |
Save view | Right-click ViewCube | Locks orientation for sheet use |
Pro Tip: After saving a view, right-click it in the Project Browser and select “Properties.” Set the View Template to control visual style without locking the section box extents. This keeps your views consistent without restricting your coordination flexibility.
How to use section boxes for coordination and documentation
Section boxes become most powerful when they are part of a repeatable workflow rather than a one-off tool. View Templates control visual style in 3D views but do not lock section box extents. That separation is intentional. Apply a template to standardize line weights, detail level, and model graphics while keeping each section box unique to its coordination purpose.
Naming and organizing dedicated views is the next step. Duplicating 3D views with section boxes for specific floors, wings, or systems makes large projects manageable. A naming convention like “3D SB L3 MEP East Wing” tells every team member exactly what the view shows before they open it. This approach also speeds up sheet assembly during documentation phases.
For clash detection, combine section boxes with color filters and interference checks. Color filters and interference checks on boxed views highlight clashes and reduce visual noise in coordination meetings. Structural and MEP teams can review the same named view and see the same cut, which eliminates the confusion of mismatched viewpoints.
For a deeper look at how 3D views fit into the broader coordination process, the S15studio guide on Revit coordination models covers linked files, worksets, and view management in one place.
A few best practices worth following:
Create one section box view per floor or zone, not one view for everything.
Use Scope Boxes to enforce consistent crop zones across disciplines.
Keep section box views out of the default {3D} view to prevent accidental resets.
Avoid unnecessary complexity on small projects where a simple plan section communicates the same information.
Advanced tips and troubleshooting for section box issues
The most common frustration with section boxes is unexpected resets. Section boxes reset to model extents when toggled in the default 3D view. The fix is simple: never use the default {3D} view as a coordination space. Duplicate it, name it, and lock it.
BIM professionals treat the default 3D view as a throw-away workspace. Every section box worth keeping lives in a dedicated, named, saved view. That one habit eliminates the most common source of view drift on collaborative projects.
Additional troubleshooting points:
Section box not visible in 3D: Check that the view is set to Orthographic, not Perspective. Section boxes do not display in perspective views.
Box grips not selectable: Click the section box boundary, not the model geometry. If the box is still unresponsive, check that the view is not locked.
Section box too large after BX: The BX command fits to the bounding box of selected elements. Select a tighter group of elements before pressing BX.
Inconsistent cuts across views: Assign a Scope Box to each 3D view. This forces all views using that Scope Box to clip at the same boundaries.
Performance still slow after cropping: Reduce the number of linked models visible in the view using Visibility/Graphics. Hiding unnecessary linked files compounds the performance gain from the section box.
For architects managing Revit worksets across a team, locking saved section box views also prevents teammates from accidentally moving the box during a session.
Key Takeaways
The section box is the most direct tool in Revit for isolating model geometry in 3D, and using it in dedicated saved views is the single habit that separates organized workflows from chaotic ones.
Point | Details |
Section boxes work in orthographic views only | Perspective views do not support section box clipping or dimensional accuracy. |
BX shortcut fits the box to selected elements | Pressing BX after selecting geometry reduces visible model size by over 90% in large projects. |
Always duplicate before enabling a section box | Working in a named duplicate protects your settings and prevents accidental resets. |
Edit box position in 2D views for precision | Plan and elevation views give you exact control over cut planes that 3D orbit cannot match. |
Combine with Scope Boxes for team consistency | Assigning a Scope Box forces all linked views to clip at the same boundaries across disciplines. |
What I’ve learned from years of teaching section boxes
Most architects discover section boxes by accident, usually when they check a checkbox in Properties and suddenly half the model disappears. That moment of confusion is actually a great teaching opportunity. The tool is doing exactly what it should. The problem is that nobody explained the workflow around it.
The habit I push hardest in my courses at S15studio is this: duplicate first, name it clearly, then activate the section box. That sequence takes 20 seconds and saves hours of frustration. The default {3D} view is not a coordination space. It is a scratch pad. The moment you start treating it that way, your Project Browser gets cleaner and your sheets get more reliable.
I also see architects overuse section boxes on straightforward projects. A single-story retail fit-out does not need eight named section box views. Use the tool where it earns its place: complex MEP coordination, multi-level structural connections, or detailed joinery. On simpler projects, a well-placed section or elevation communicates the same thing faster.
The combination of section boxes with View Templates and Scope Boxes is where the real power lives. Templates keep your visual style consistent. Scope Boxes keep your cut zones consistent. Section boxes give you the flexibility to adjust within those constraints. Together, they make your 3D views genuinely useful for documentation, not just for internal navigation.
— Steve
Build stronger Revit skills with S15studio

Section boxes are one piece of a much larger Revit workflow. Knowing when and how to use them, alongside view templates, worksets, and coordination models, is what separates a competent Revit user from a confident one. S15studio offers structured training from introductory to advanced levels, all built around real architectural projects. The complete Revit training program covers 3D view management, section box workflows, documentation setup, and Autodesk certification preparation. If you are newer to the software, the beginner Revit course walks through core tools including section boxes with clear, practical examples. Both courses are self-paced and designed for working architects and technicians.
FAQ
What is a Revit section box?
A Revit section box is a six-sided clipping boundary applied to an orthographic 3D view. It hides geometry outside its planes without deleting or globally hiding any elements.
How do I activate a section box in Revit?
Open an orthographic 3D view, go to the Properties panel, and check the Section Box checkbox under the Extents group. The box appears immediately around the full model.
What is the keyboard shortcut for section boxes in Revit?
Press BX after selecting elements in any view. Revit switches to the 3D view and fits a section box tightly around your selection automatically.
Why does my section box keep resetting?
Section boxes reset when toggled in the default {3D} view. Duplicate the view, name it, and save it using the ViewCube right-click menu to lock the position permanently.
What is the difference between a section box and a Scope Box?
A section box clips a single 3D view at adjustable planes. A Scope Box applies a consistent volumetric boundary across multiple view types and disciplines to standardize crop zones project-wide.
Recommended
Comments