
Stop CAD cleanup: Revit DWG export with three setups for architects


To export DWG from Revit, go to File > Export > CAD Formats > DWG, select your views or sheets, and run or save an export setup. The one rule that saves the most rework: always export with a saved setup that maps Revit categories to CAD layers and locks in the correct units before you click export. Note that Revit Viewer cannot run this export at all. You need full Revit or Revit LT.
TL;DR:
Always use a pre-defined export setup with correct layer mapping and units to avoid rework when exporting DWG files from Revit.
Choose the export scope and version carefully, matching the recipient’s CAD version and clarity needs to prevent confusion and fidelity loss.
Configure layer overrides to either export all categories by layer or preserve element overrides, and transfer standards across projects to streamline repeat exports.
Confirm view settings, visibility, and linked model display options before exporting, as these directly impact the accuracy and completeness of the DWG file.
Automate batch exports and develop standardized setups to reduce human error and improve consistency across multiple projects and large model sets.
Table of Contents
How Do You Export Revit to AutoCAD Step by Step?
The mechanics of exporting Revit to AutoCAD are simple. What trips people up is the sequence of small decisions inside the dialog, each one shaping what the recipient actually opens.
Here’s the reliable order of operations:
Open the export dialog. Go to File > Export > CAD Formats > DWG. This launches the same interface Autodesk documents for exporting views and sheets to CAD.
Pick or build an export setup. The dropdown at the top lets you select a saved setup or create a new one from scratch. Don’t skip this. It’s the control panel for everything downstream.
Choose your scope. You can export the current view, or switch to “In-session view/sheet set” and check multiple views or sheets. Naming options here matter: exporting sheets tends to use sheet numbers in the file name, while exporting views defaults to view names, so mismatched naming conventions across a set create confusing file lists for consultants.
Set the AutoCAD version. Older versions (like 2010) maximize compatibility with a consultant’s older CAD software, but you lose some newer entity support. Most firms should match whatever version the receiving office confirms it uses.
Decide on external references. The “Export views on sheets and links as external references” option keeps linked Revit models as separate DWG xrefs rather than merging everything into one file. This matters for large multi-discipline projects.
Save Set & Close vs. Start Export. Save Set & Close stores your view/sheet selection for reuse without exporting. Start Export runs it immediately. Use Save Set & Close when you’re building a repeatable export list you’ll run again next week.
How Do You Modify Export Setup and Layer Mapping in Revit?
Layer mapping is where most Revit-to-CAD friction actually starts, and it’s fixable in one dialog if you set it up once and reuse it.
Open the export dialog, click the button next to the export setup dropdown, and you land in Export Setups DWG/DXF. The Layers tab is the important one. It controls how every Revit category and subcategory translates into a CAD layer name, and it gives you three fundamentally different strategies:
Export all properties BYLAYER, do not export overrides. Every element on a category gets pushed to that category’s layer, ignoring any view-specific color or line overrides. This produces the fewest layers and the cleanest file for consultants who just need a clean reference drawing.
Export overrides BYENTITY. This preserves per-element color and linetype overrides directly on the entity rather than the layer, which keeps visual fidelity but makes CAD-side layer control harder for the recipient.
Create new layers for overrides. Revit generates additional layers for any element with a graphic override. Visual accuracy stays intact, but layer counts can balloon on complex projects.
The Layers tab configuration also lets you load a layer standard from a text file, so an office CAD standard can drive the mapping instead of Revit’s defaults. Once your setup is right, use Transfer Project Standards to copy it into other projects instead of rebuilding it by hand every time.
Pro Tip: Keep one master project as your “export setup library.” When you improve a mapping, transfer it into that master file first, then push it out to active projects. It’s far easier to manage one source of truth than to chase edits across a dozen live jobs.
Which Export Settings Actually Affect Drawing Fidelity?
Layer mapping gets the attention, but color, line, font, and unit settings decide whether the file actually looks right once it lands in someone else’s AutoCAD session.
Colors. The Colors tab controls whether Revit exports true RGB colors or maps everything to AutoCAD’s index color system. If a consultant’s CAD standard runs color-by-layer, set your export to properties BYLAYER so color and lineweight both follow the layer, not the individual element.
Lines and lineweights. Check the Line Styles tab against your office’s expected pen weights before export, not after. A lineweight that looks fine in Revit’s view can plot invisibly thin in AutoCAD if the mapping table doesn’t carry it over correctly.
Text and fonts. Revit substitutes fonts on export, and if the recipient doesn’t have the same font installed, AutoCAD swaps in a default that shifts text spacing and can blow out title block alignment. Stick to standard TrueType fonts when the file is heading outside your office.
Units and coordinates. The Units and Coordinates tab sets the DWG unit (feet, millimeters, and so on) and whether the file exports relative to the Revit project origin or a shared/survey point. Get this wrong and every linked xref lands in the wrong place. View scale also affects precision here, since tighter scales keep close lines distinct rather than merging them for performance.
What Should You Check in Revit Before You Export?
Most AutoCAD cleanup time traces back to something that could have been fixed in Revit five minutes before export. Run through this before you touch the export dialog:
Audit the model. Purge unused tiny geometry, stray detail lines, and orphaned annotation that snuck into the view but adds no value to the CAD recipient.
Decide your override strategy up front. Forcing BYLAYER keeps layer counts low; preserving overrides keeps visual intent but multiplies layers. Pick based on whether the recipient needs an editable file or a clean reference.
Save a separate copy of the central file for export. Running exports directly against a live worksharing file risks sync conflicts and accidental edits mid-export. Detach a copy or use a dedicated export session.
Standardize view templates and annotation scales. Inconsistent scales across sheets cause dimension text and hatch patterns to export at wildly different apparent sizes.
Confirm linked model visibility. If a linked Revit model is set to display halftone or is turned off in the view, that setting carries into the export and can make elements vanish from the DWG.
Pro Tip: Export one test sheet with your final setup before running the whole set. A five-minute spot check in AutoCAD catches a bad layer mapping before you’ve generated 40 files with the same mistake.
How Do You Batch Export Multiple Revit Views or Sheets?
Manually exporting sheet by sheet works for small jobs and becomes a liability on large ones. Set up a named view/sheet set in Revit so the same selection is reusable every time you re-export a revision, rather than reselecting views by hand.
For firms exporting dozens of sheets across multiple RVT files on a regular basis, automation tools like Ideate Automation can batch-run exports across entire model sets without manual dialog clicks, and some offices script the same behavior with Dynamo. Both approaches cut down on the repetitive UI steps that cause human error at 4 p.m. on a deadline day.
A few practical habits:
Build file names from a consistent pattern: project code, sheet number, revision. Avoid free-text view names that vary between team members.
Match the AutoCAD version to whatever the receiving consultant confirmed, not whatever your last project used.
For linked models, decide whether to export them as external references or flatten everything into one file. Xrefs keep file sizes manageable on large multi-building projects.
How Do You Fix Common Revit DWG Export Problems?
Most Revit DWG export issues fall into five recognizable buckets, and each one has a fast diagnostic.
Extra or duplicate layers. Check your export setup’s override handling. If it’s set to create new layers for every override, switch to BYLAYER and re-export to collapse the layer count.
Missing objects or annotation. Confirm the elements are actually visible in the selected view, not just the model. Filters, worksets set to hidden, and view-specific overrides all silently drop content from the export without any warning.
Scale or precision issues. If fine details merge into single lines or geometry looks coarse, revisit the view scale and the export precision setting rather than assuming the geometry itself is wrong.
Font or hatch substitution problems. Confirm the recipient has the fonts you used, and check hatch pattern scale, since Revit and AutoCAD don’t always interpret pattern density identically.
Export options grayed out. This almost always means you’re in Revit Viewer, which can’t perform DWG exports, or the file is open read-only.
Pro Tip: Keep a small “QA” test project with known geometry, text, and hatch patterns. Run any new export setup against it first. If something breaks, you’ll see it in a controlled file instead of a live deliverable.
What Does an Autodesk Certified Trainer Recommend for DWG Handovers?
The single highest-leverage move for any office is treating the export setup as a project standard, not a personal preference. When one setup gets distributed through Transfer Project Standards across every active job, layer names, colors, and units stop drifting between projects and between staff members.
Run a short QA loop on every new or edited setup: export a sample sheet, open it in AutoCAD, and check layers, lineweights, and fonts before you trust it on a real deliverable. If something’s off, fix the setup, not the individual file.
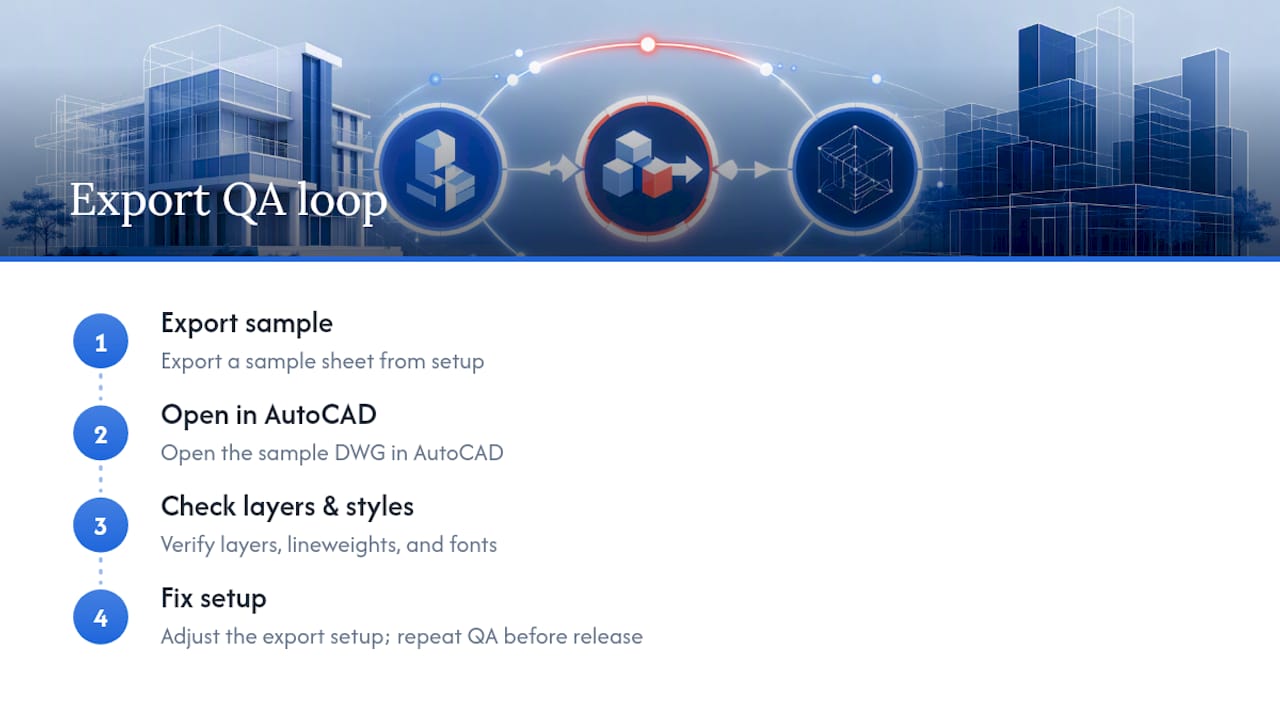
For onboarding new staff, short focused modules on export setup, layer mapping, and QA checks build this habit faster than a generic Revit overview ever will.
What Mistakes Do Offices Actually Make With Revit DWG Exports?
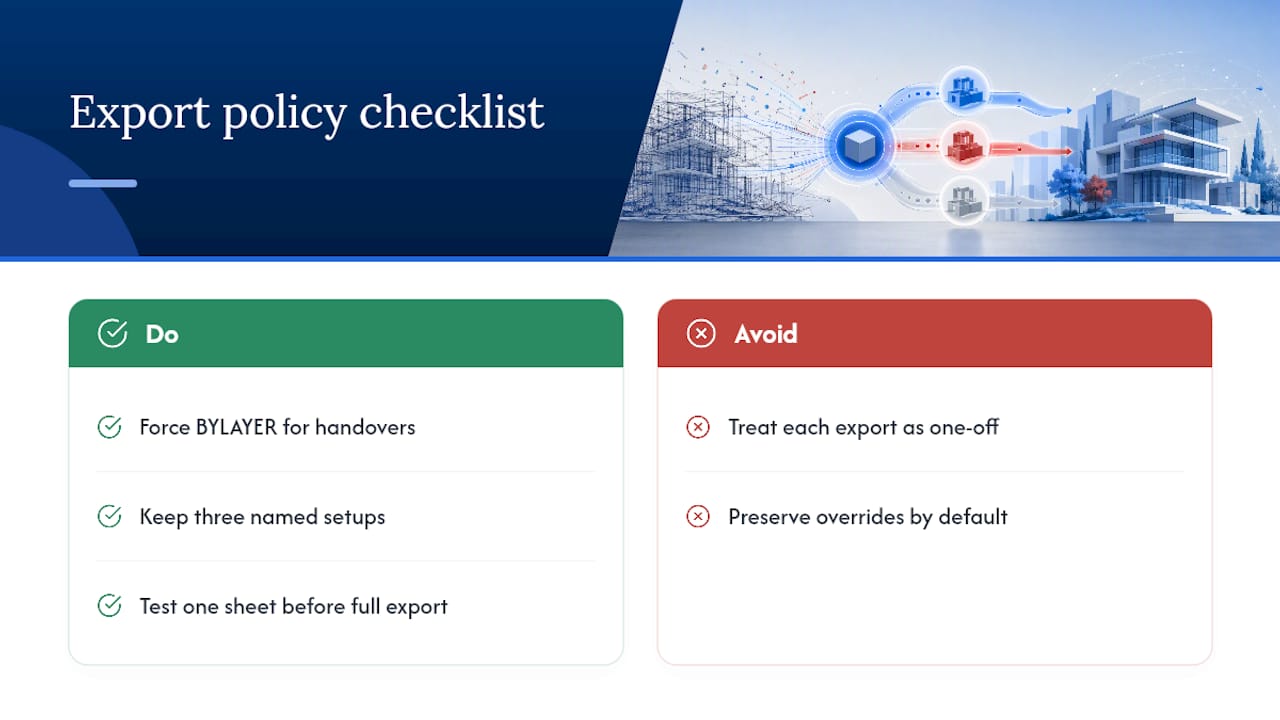
The recurring problem I see isn’t a missing feature. It’s teams treating every export like a one-off decision instead of a policy. One fix that works well: force BYLAYER for consultant handovers by default, and only preserve overrides when a consultant specifically asks for them.
Keep three named export setups on hand. Something like “Precision,” “For Drawing,” and “For Reference” covers most real-world requests without reinventing settings each time. Test one sheet against the actual setup before running a full export. That single step catches most of the errors that would otherwise ship to a consultant.
— Steve
Master Revit-to-DWG Handovers With S15studio
If your office keeps rebuilding export setups from scratch, the fix isn’t another checklist. It’s structured training that gets the setup right once. S15studio’s Complete Revit and AutoCAD Training walks through export setups, layer mapping, and the QA checks covered above, using real project files instead of abstract slides.

The training includes practical exercises, reusable templates, and access to course material to help teams standardize their export setups. If you’re newer to the software, the Revit Introduction course covers export basics alongside the fundamentals you’ll need first. Start with either course landing page and pick the level that matches where your export workflow stands today.
Where to Find Official Revit DWG Export Documentation
Autodesk’s own documentation remains the most reliable reference for exact dialog behavior, since UI details shift slightly between versions. Start with Export to DWG or DXF for the full settings breakdown, and the layer mapping guide for a deeper look at override handling.
For batch workflows across large model sets, Ideate Automation’s export documentation covers the automation side in more depth than this guide has room for. If you want a video walkthrough of the export dialog in action, S15studio’s YouTube channel has short, practical demonstrations worth bookmarking.
Recommended
Comments